Tenant-to-Tenant Migration Roadmap
The full migration lifecycle from kickoff to final cutover. We are always the target tenant. This roadmap covers both provisioning branches; Branch 1 (the Migration Control Center) is documented step by step below.
Migration Kickoff
The engagement starts with a kickoff and requirements discussion, followed by CIT sending the Base Excel to the source company. It covers users, guest users / contractors, ex-employees, shared mailboxes, distribution lists, SharePoint sites, Teams, contacts, resources, tenant applications, service accounts, and licenses.
Once the completed Excel comes back, CIT reviews it for errors, duplicates, and data glitches before any provisioning begins. The workflow then splits into two branches:
Branch 1 — Identity Provisioning
With the reviewed Excel in hand, MCC provisions all identities in the target tenant under a temporary domain, then notifies users and tracks adoption.
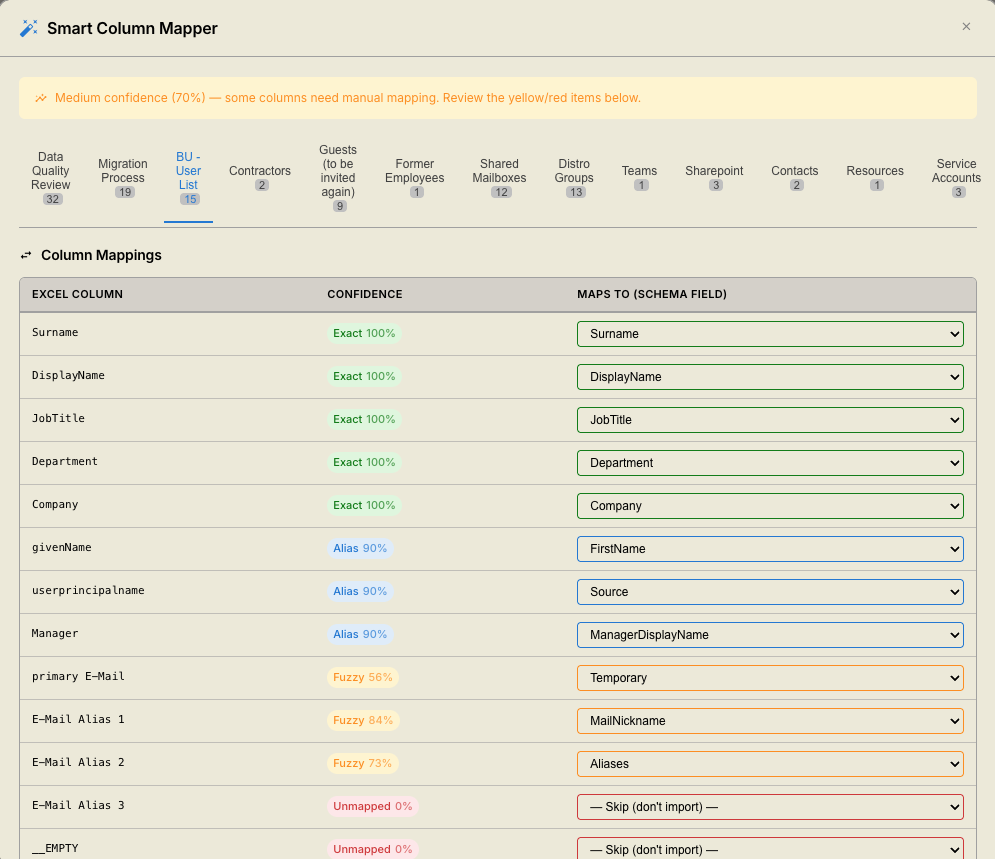
MCC field-mapping wizard with Excel columns mapped to CSV fields.
MCC "New Project" screen with the CSV import dialog.
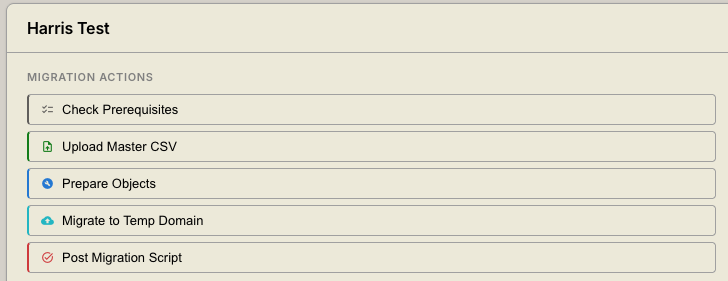
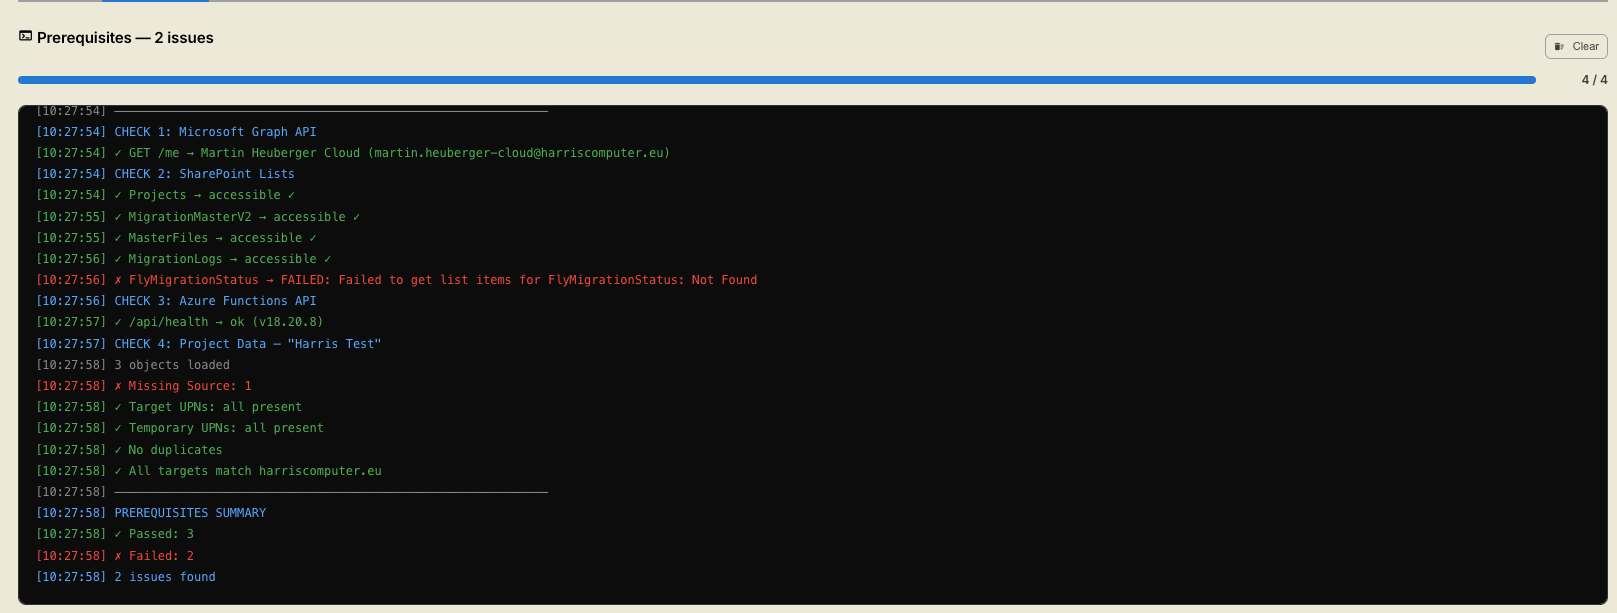
- Check Prerequisites — verifies Graph access, the SharePoint lists, the Azure Functions API, and validates the project data (missing Source/Target, duplicates, domain mismatches).
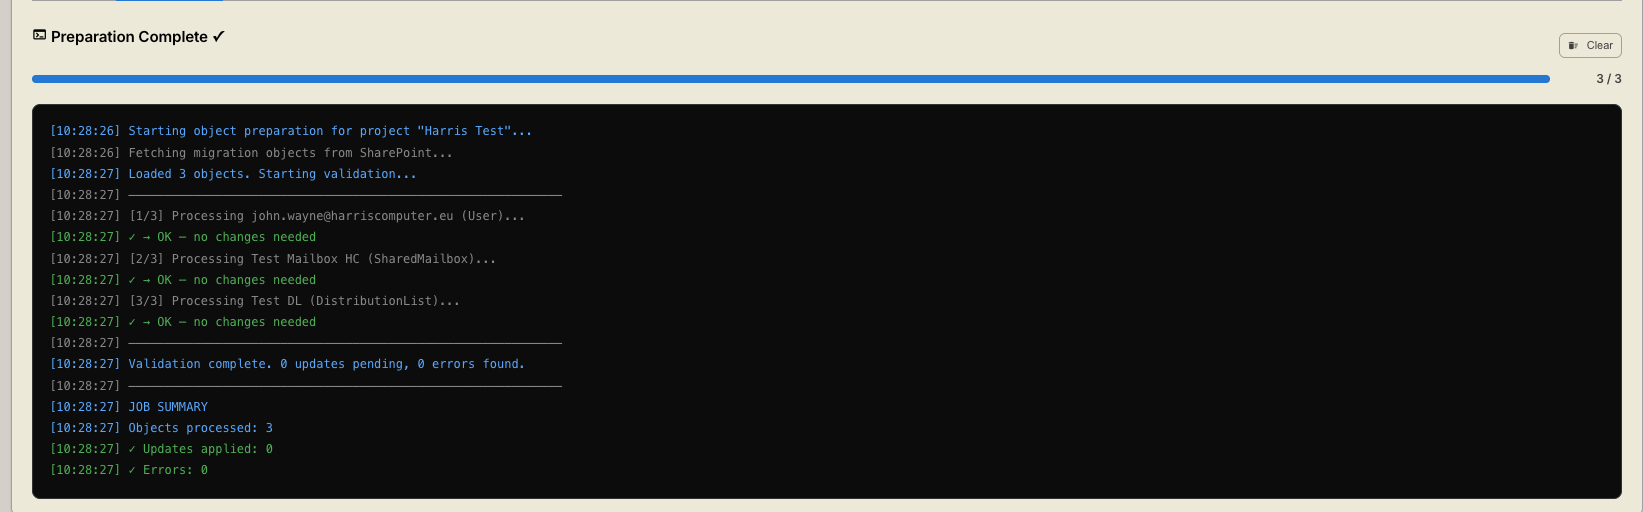
- Prepare Objects — assigns the missing temp and target
domains, fixes
mailNicknamevalues, and flags duplicate objects.
Left: Check Prerequisites results. Right: Prepare Objects log output.
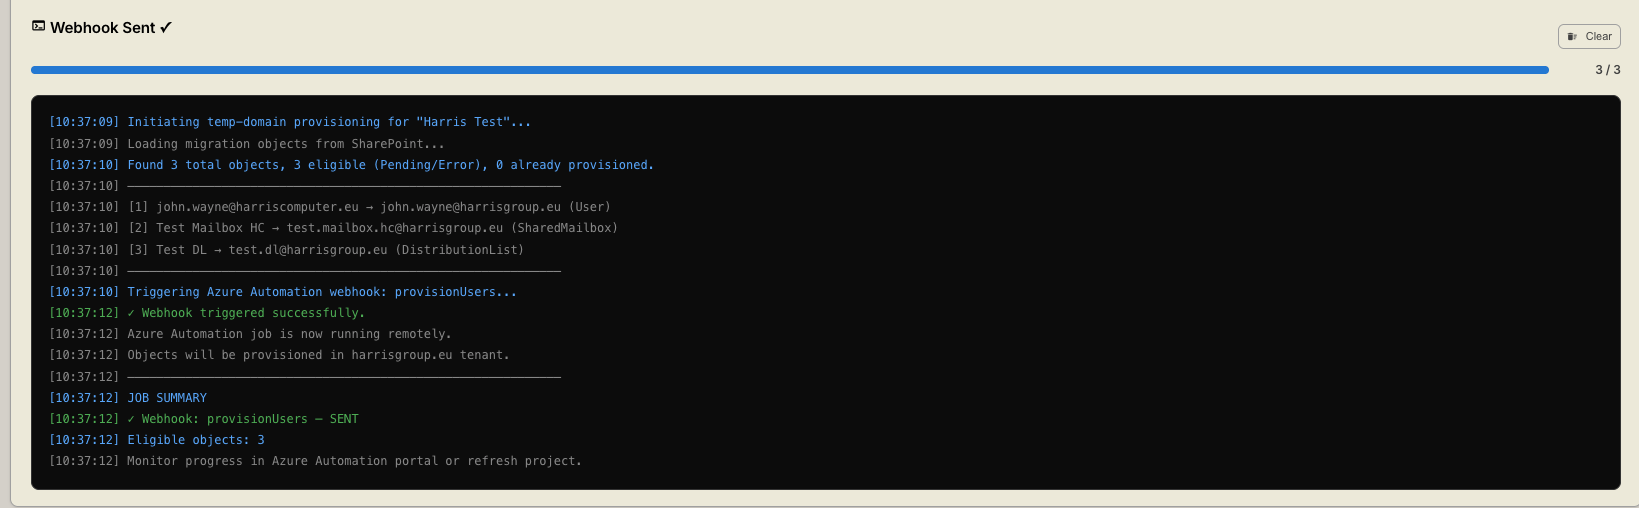
harrisgroup.eu), across four object types:
Users, Security Groups, Shared Mailboxes, and
Distribution Lists.
MCC "Migrate to Temp Domain" progress screen.
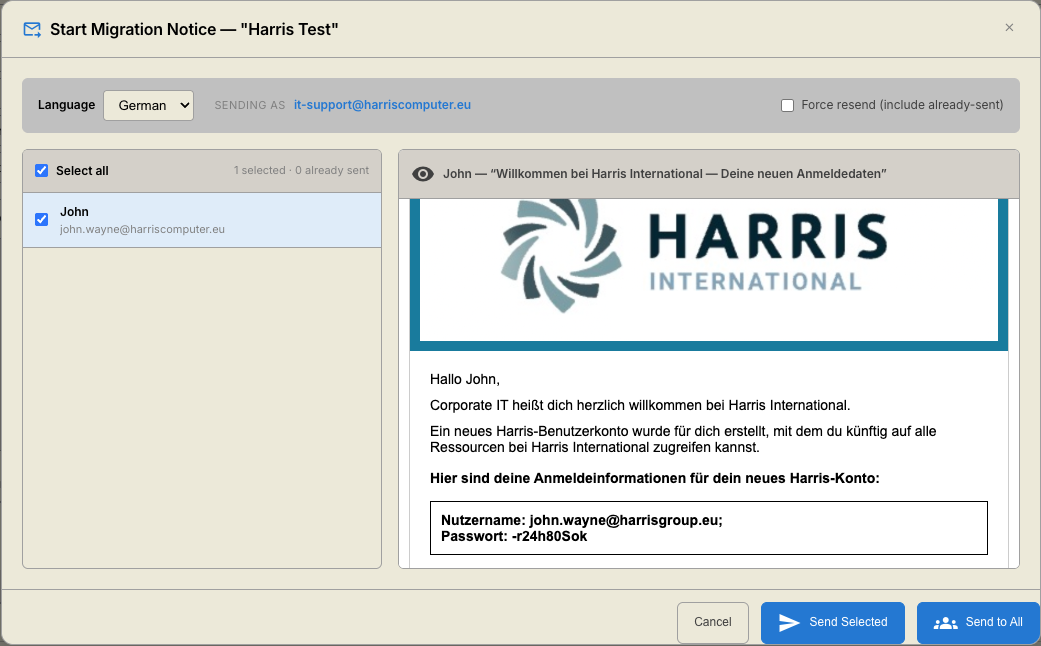
MCC Communications live email preview window.
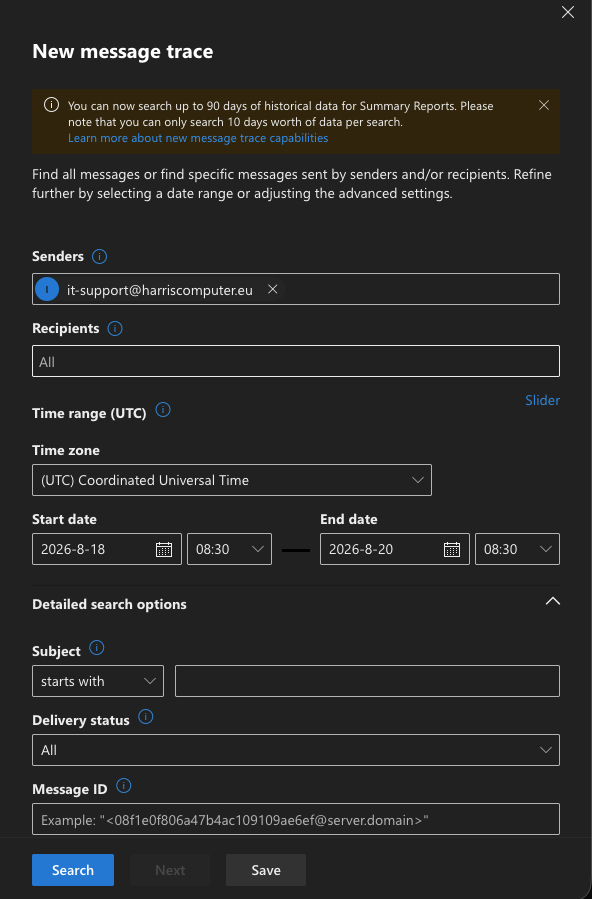
Retry-After header). Status is visible in the terminal tab, but Exchange mail flow
gives a clearer real-time view of delivery.
Exchange admin center mail flow report showing delivery status.
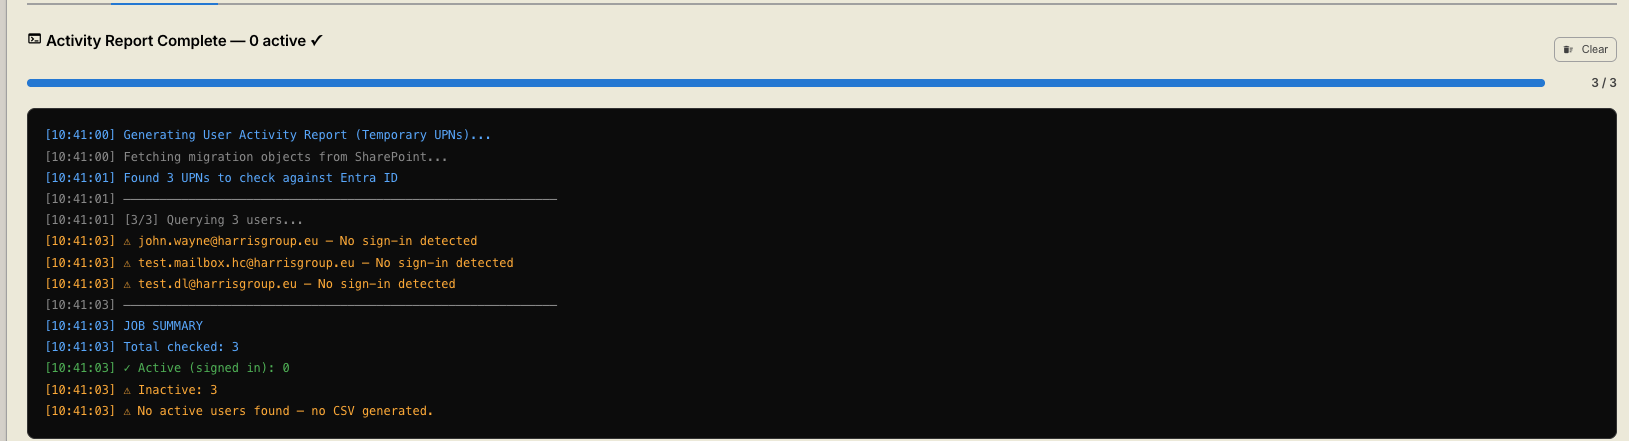
MCC Activity Report showing login / MFA status per user.
Branch 1 — AvePoint Fly Setup
With identities provisioned, the M365 workload migration (Exchange, Teams, SharePoint, OneDrive) moves to AvePoint Fly.
- Phase 1 — Source → Temp (initial migration into the temp domain)
- Phase 2 — Temp → Target (used after the domain transfer)
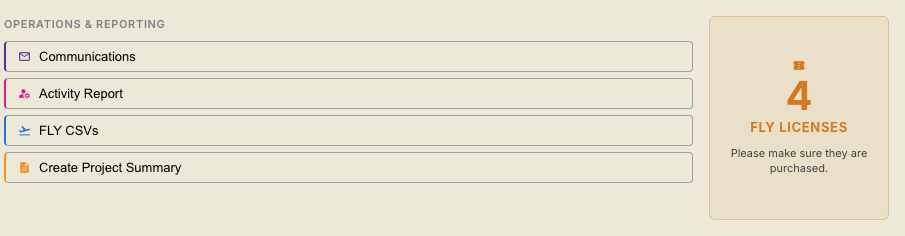
MCC "Fly CSVs" phase choice + export with license-count summary.
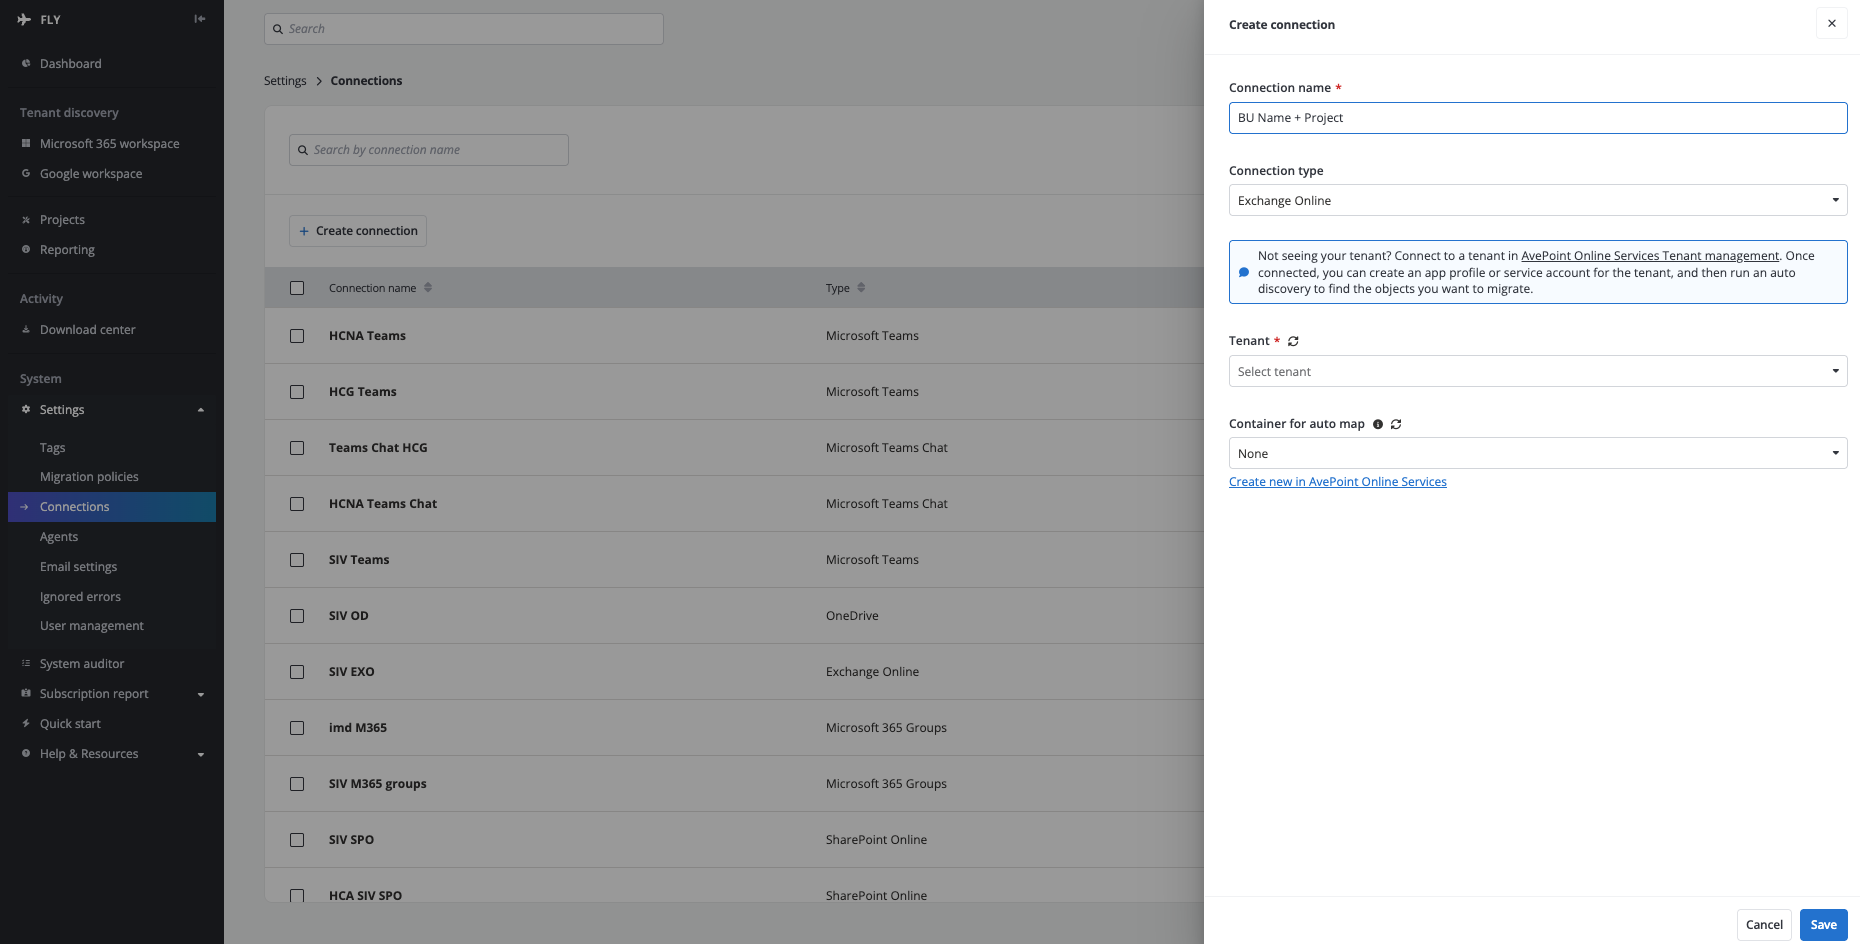
AvePoint Fly Connections page — source/destination tenant setup.
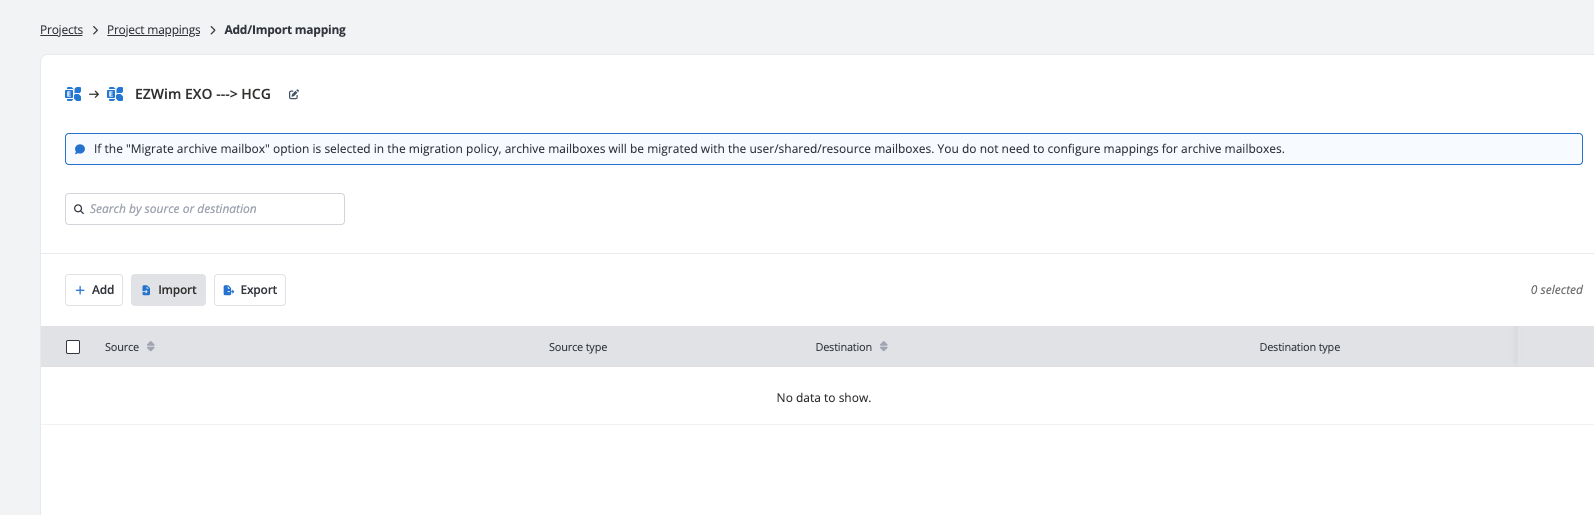
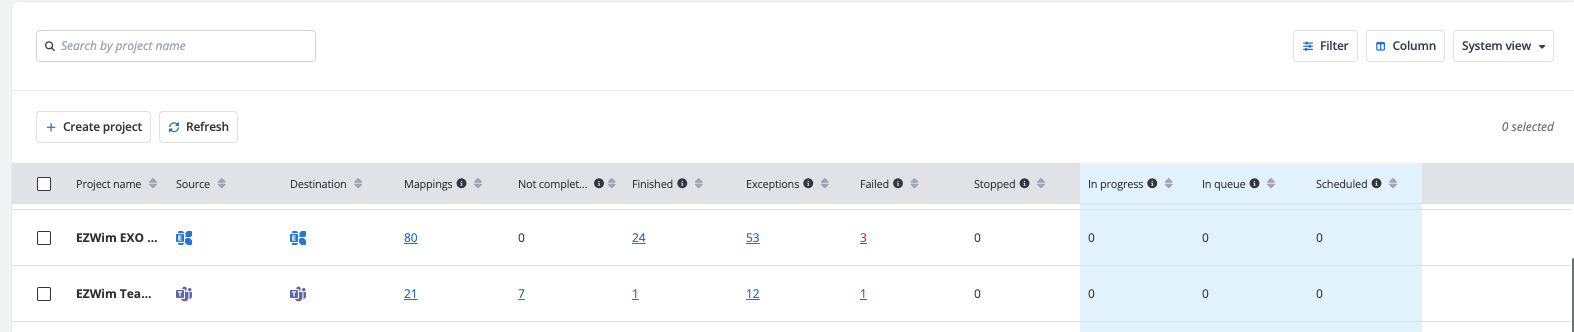
AvePoint Fly Projects page showing the workload projects created.
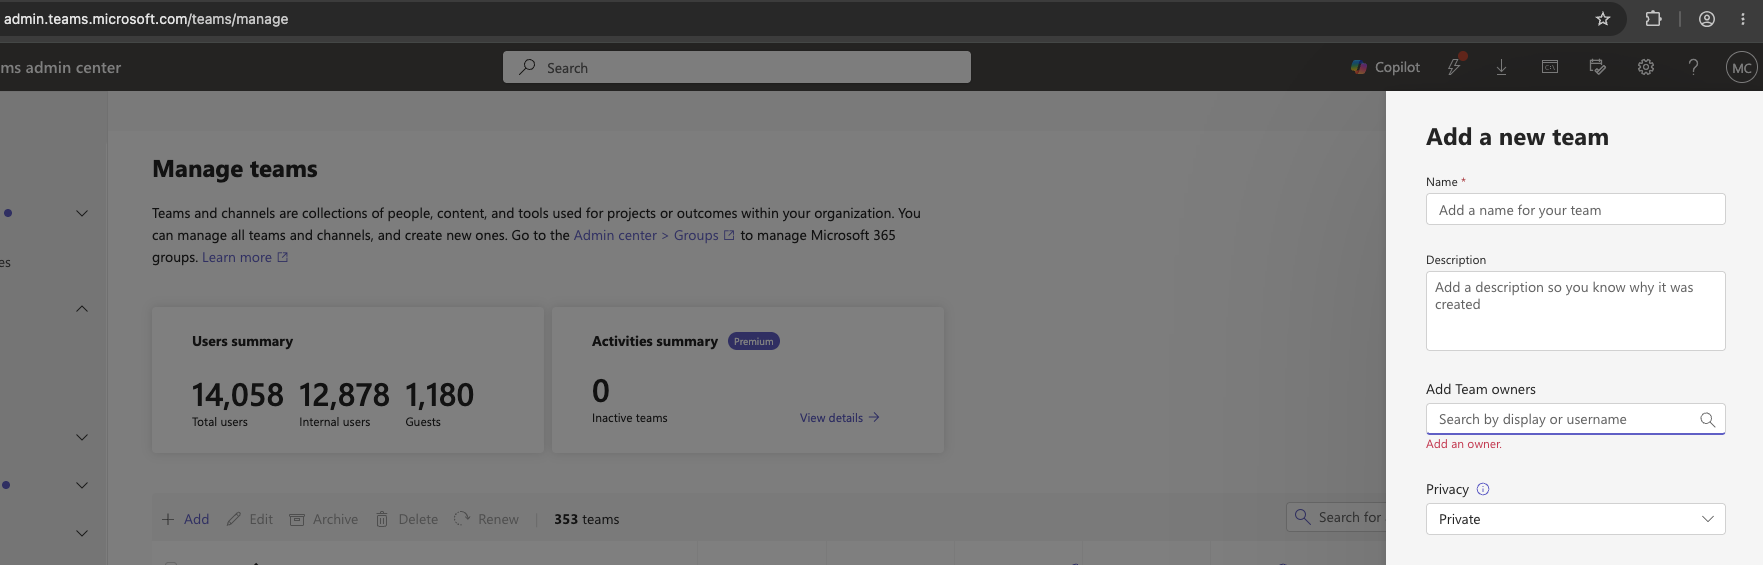
Teams admin center showing manually pre-created teams / rooms.
MCC migration progress charts / AvePoint Fly job monitoring dashboard.
Branch 1 — Post-Migration & Cutover
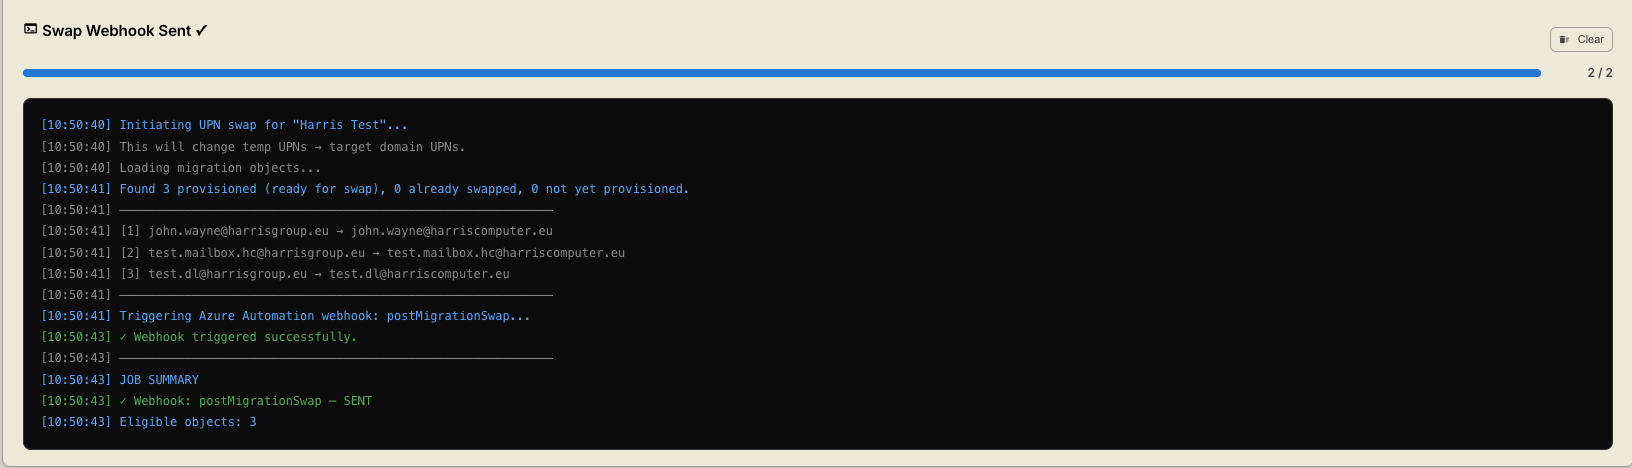
After the bulk workload migration, users verify their data, incrementals catch up, the source domain is transferred, and MCC swaps every object onto its final target address.
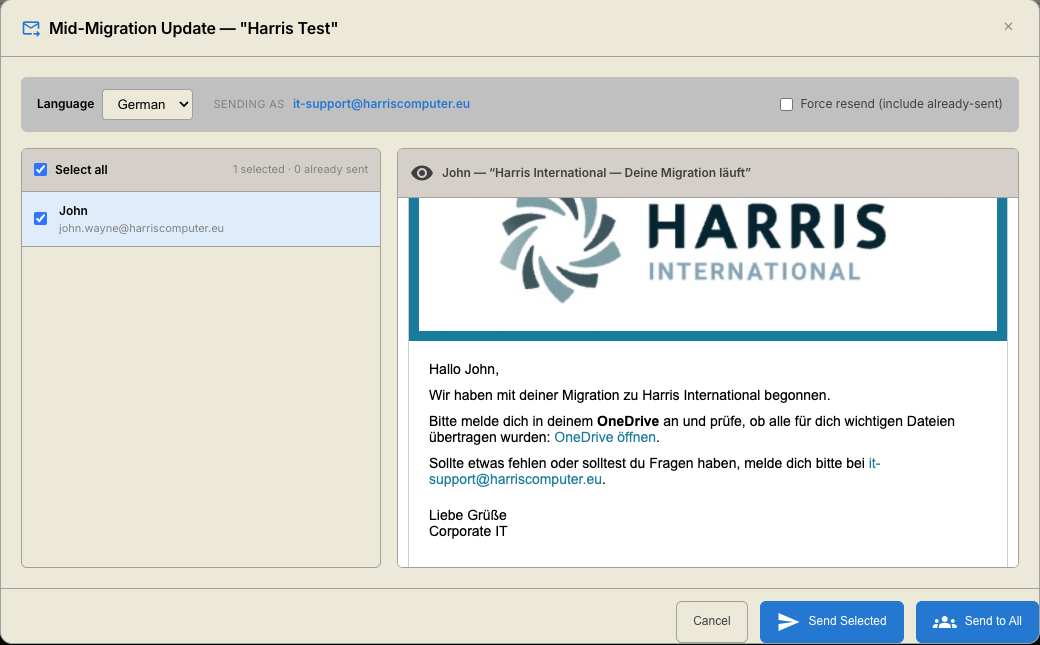
MCC Mid-Migration Update communication screen.
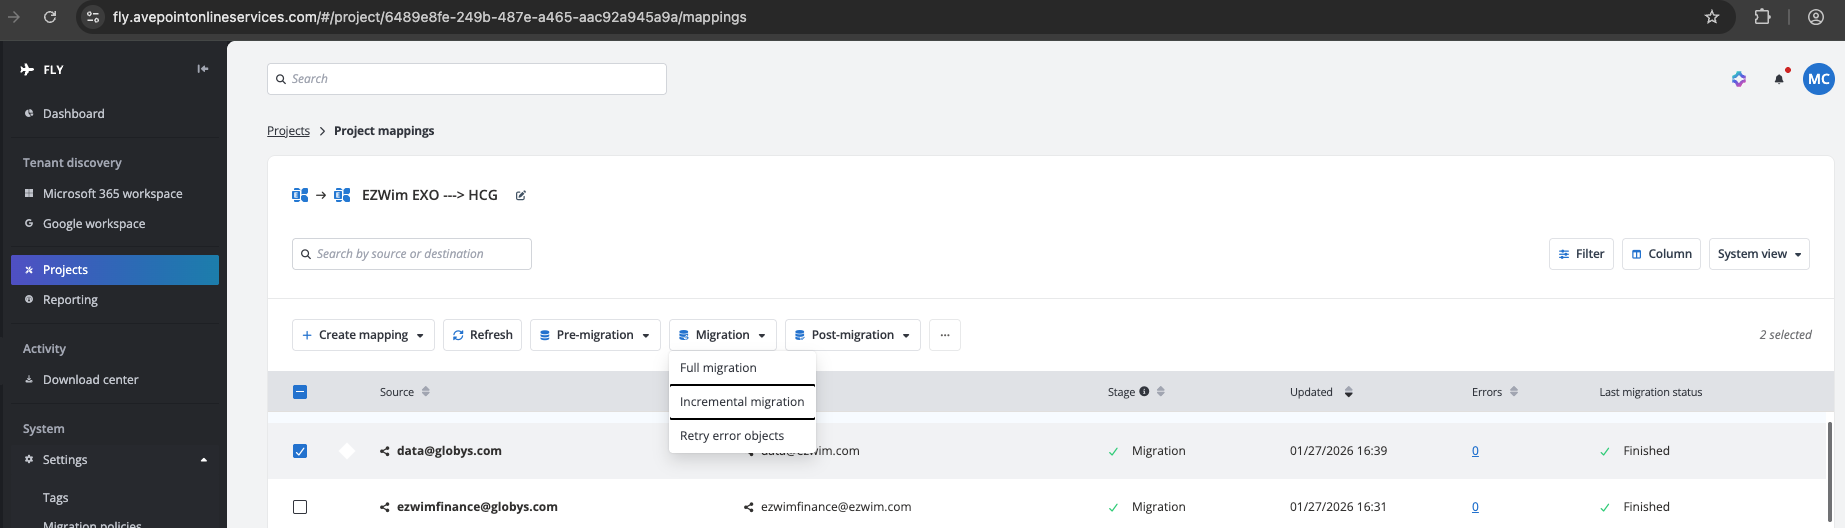
AvePoint Fly incremental migration job schedule / history.
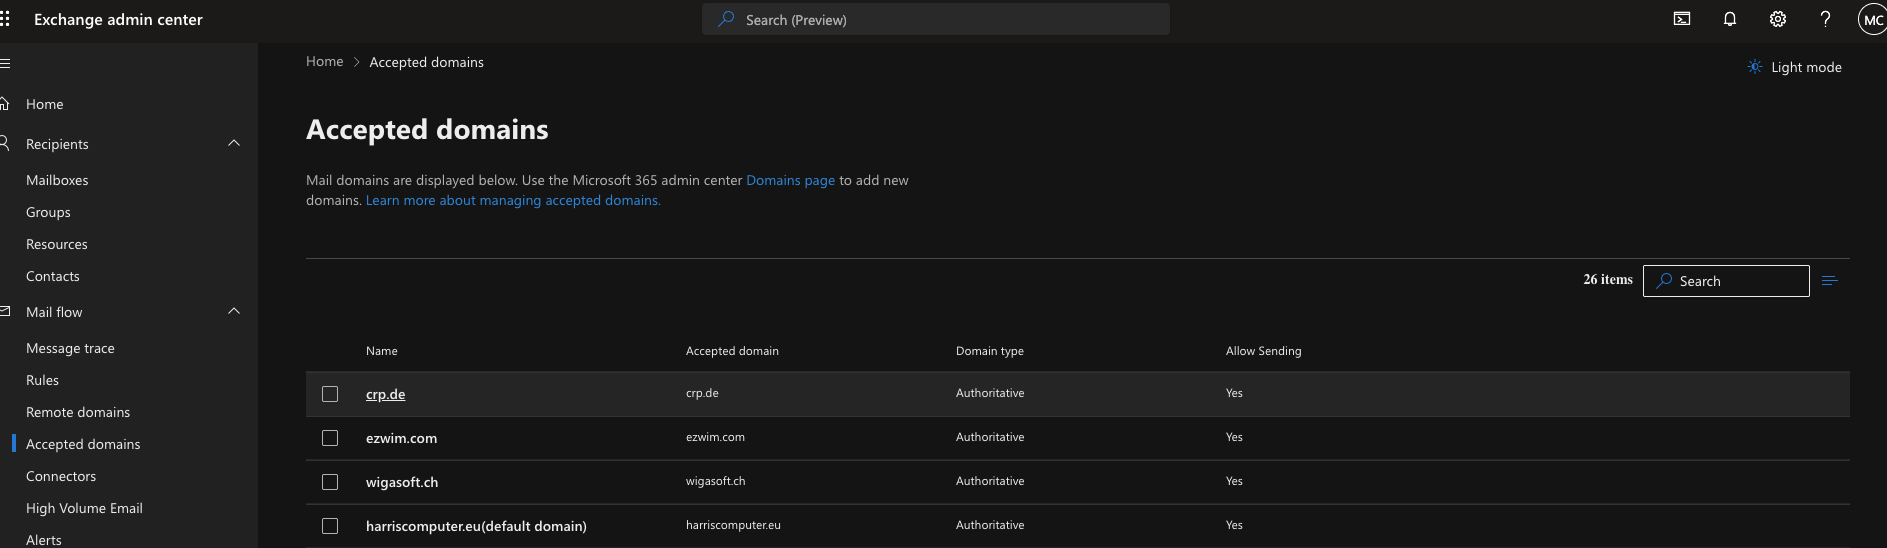
Entra ID / M365 admin center showing the domain verified in the target tenant.
MCC Post-Migration Script execution / results screen.
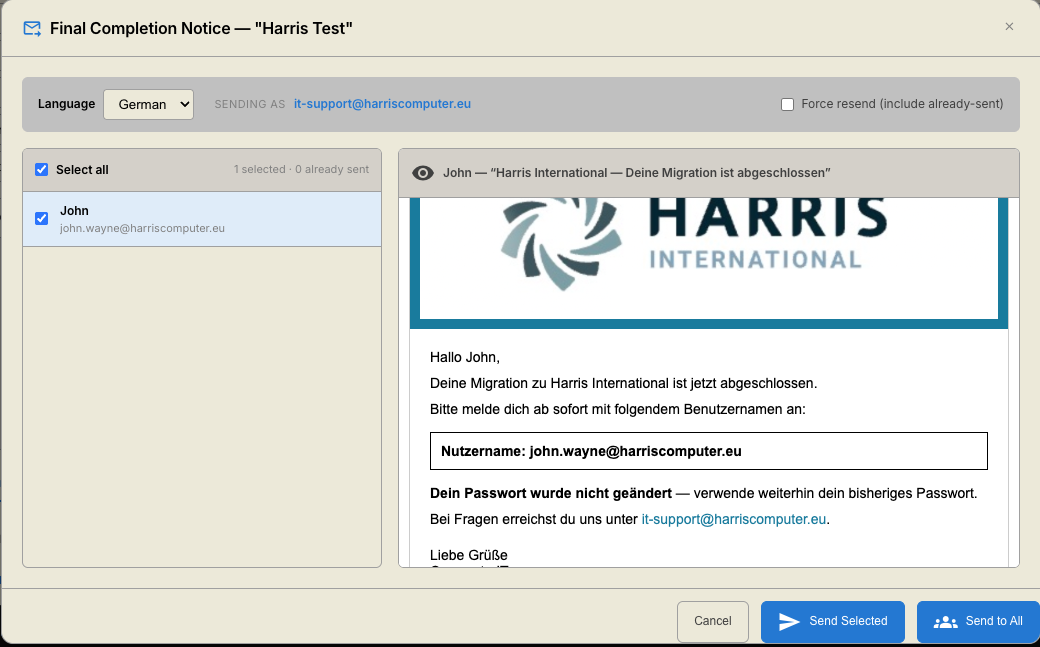
MCC Final Migration Notice communication screen.
Branch 2 — Manual / GitHub Path
This branch is used when MCC isn't the tool of choice, relying instead on two
standalone PowerShell scripts from the GitHub repo (branch2/) that are
downloaded and run locally by a Global Admin (interactive sign-in — no Azure
Automation, no SharePoint dependency), plus a Power Automate-driven mailer. Domain transfer is
identical to Branch 1. Full setup + per-step instructions: branch2/README.md.
Install-Module Microsoft.Graph -Scope CurrentUser and
Install-Module ExchangeOnlineManagement -Scope CurrentUser; sign in as a Global
Administrator when prompted.
| # | Action | Location |
|---|---|---|
| 1 | Fill templates/Provisioning_Template.csv, then run the provisioning script.
It creates Users, Security Groups, Shared Mailboxes and Distribution Lists under the
temp
domain (harrisgroup.eu), generates unique passwords, and outputs a
Provisioning_Results_<timestamp>.csv.
|
GitHub → branch2/Provision-Objects.ps1 |
| 2 | Update the CIT SharePoint Mailer's recipient list from the results CSV (temp UPN + password per user), then send the greeting template. | CIT Mailer SharePoint list/site |
| 3 | Download AvePoint Fly CSV templates and populate them manually with the existing migration data | Local / shared drive template storage |
| 4 | Create Fly projects (Exchange, Teams, OneDrive; SharePoint set up manually) and upload the completed CSVs. Pre-create destination Teams/Rooms. | AvePoint Fly Portal |
| 5 | Send migration communications via the Mailer | Power Automate → Flows shared with me → Migration Mailer Flow |
| 6 | After initial migration completes, send the mid-migration notice via the PA Flow Mailer and request data confirmation | Same PA Flow |
| 7 | Begin weekly incremental migrations until complete | AvePoint Fly Portal |
| 8 | Execute domain transfer (same process as Branch 1) | Entra ID / M365 admin center |
| 9 | Fill templates/PostMigration_Template.csv (or reuse the provisioning
results
CSV), then run the post-migration swap to set each object's UPN + primary SMTP to the
Target. Optional address enrichment via a local CompanyDomains CSV. |
GitHub → branch2/Set-PostMigrationDomain.ps1 |
| 10 | Send the Final Migration Notice via the PA Flow Mailer | Same PA Flow |
Migrations-Kickoff
Das Projekt beginnt mit einem Kickoff und einer Anforderungsbesprechung. Anschließend sendet CIT das Basis-Excel an das Quellunternehmen. Es umfasst Benutzer, Gastbenutzer / externe Mitarbeiter, ehemalige Mitarbeiter, freigegebene Postfächer, Verteilerlisten, SharePoint-Sites, Teams, Kontakte, Ressourcen, Mandantenanwendungen, Dienstkonten und Lizenzen.
Sobald das ausgefüllte Excel zurückkommt, prüft CIT es auf Fehler, Duplikate und Datenprobleme, bevor mit der Provisionierung begonnen wird. Der Ablauf teilt sich dann in zwei Zweige:
Zweig 1 — Identitäts-Provisionierung
Mit dem geprüften Excel provisioniert MCC alle Identitäten im Zielmandanten unter einer temporären Domäne, benachrichtigt anschließend die Benutzer und verfolgt die Akzeptanz.
MCC-Feldzuordnungsassistent mit Excel-Spalten, die CSV-Feldern zugeordnet sind.
MCC-Bildschirm „Neues Projekt“ mit dem CSV-Importdialog.
- Voraussetzungen prüfen — überprüft den Graph-Zugriff, die SharePoint-Listen, die Azure-Functions-API und validiert die Projektdaten (fehlende Quelle/Ziel, Duplikate, Domänen-Abweichungen).
- Objekte vorbereiten — weist die fehlenden temporären und
Zieldomänen zu, korrigiert
mailNickname-Werte und markiert doppelte Objekte.
Links: Ergebnis „Voraussetzungen prüfen“. Rechts: Protokoll „Objekte vorbereiten“.
harrisgroup.eu), über vier Objekttypen hinweg:
Benutzer, Sicherheitsgruppen, freigegebene
Postfächer und Verteilerlisten.
MCC-Fortschrittsbildschirm „In temporäre Domäne migrieren“.
MCC-Kommunikation: Live-Vorschaufenster der E-Mail.
Retry-After-Headers). Der Status ist im Terminal-Tab sichtbar, aber der
Exchange-Nachrichtenfluss bietet eine klarere Echtzeitansicht der Zustellung.
Exchange Admin Center — Bericht zum Nachrichtenfluss mit Zustellstatus.
MCC-Aktivitätsbericht mit Anmelde-/MFA-Status pro Benutzer.
Zweig 1 — AvePoint Fly Einrichtung
Nach der Provisionierung der Identitäten erfolgt die M365-Workload-Migration (Exchange, Teams, SharePoint, OneDrive) über AvePoint Fly.
- Phase 1 — Quelle → Temp (Erstmigration in die temporäre Domäne)
- Phase 2 — Temp → Ziel (nach dem Domänentransfer verwendet)
MCC „Fly CSVs“: Phasenauswahl + Export mit Lizenzanzahl-Übersicht.
AvePoint-Fly-Verbindungsseite — Einrichtung Quell-/Zielmandant.
AvePoint-Fly-Projektseite mit den angelegten Workload-Projekten.
Teams Admin Center mit manuell vorab erstellten Teams / Räumen.
MCC-Fortschrittsdiagramme / AvePoint-Fly-Auftragsüberwachung.
Zweig 1 — Nach-Migration & Umstellung
Nach der Massen-Workload-Migration überprüfen die Benutzer ihre Daten, die Inkremente holen auf, die Quelldomäne wird übertragen, und MCC stellt jedes Objekt auf seine endgültige Zieladresse um.
MCC-Kommunikationsbildschirm „Zwischen-Migrationsupdate“.
AvePoint-Fly: Zeitplan / Verlauf der inkrementellen Migrationen.
Entra ID / M365 Admin Center mit der im Zielmandanten verifizierten Domäne.
MCC-Ausführungs-/Ergebnisbildschirm des Nach-Migrations-Skripts.
MCC-Kommunikationsbildschirm „Abschließender Migrationshinweis“.
Zweig 2 — Manueller / GitHub-Weg
Dieser Zweig wird verwendet, wenn MCC nicht das Werkzeug der Wahl ist, und
stützt sich stattdessen auf zwei eigenständige PowerShell-Skripte aus dem
GitHub-Repo
(branch2/), die heruntergeladen und lokal von einem Global Admin
ausgeführt
werden (interaktive Anmeldung — keine Azure Automation, keine SharePoint-Abhängigkeit), plus einen
Power-Automate-basierten Mailer. Der Domänentransfer ist identisch mit Zweig 1. Vollständige
Einrichtung + Schritt-für-Schritt-Anleitung: branch2/README.md.
Install-Module Microsoft.Graph -Scope CurrentUser und
Install-Module ExchangeOnlineManagement -Scope CurrentUser; bei Aufforderung als
Global Administrator anmelden.
| # | Aktion | Ort |
|---|---|---|
| 1 | templates/Provisioning_Template.csv ausfüllen, dann das
Provisionierungs-Skript
ausführen. Es erstellt Benutzer, Sicherheitsgruppen, freigegebene Postfächer und
Verteilerlisten unter der temporären Domäne (harrisgroup.eu), generiert
eindeutige Passwörter und schreibt eine
Provisioning_Results_<timestamp>.csv.
|
GitHub → branch2/Provision-Objects.ps1 |
| 2 | Die Empfängerliste des CIT-SharePoint-Mailers aus der Ergebnis-CSV aktualisieren (temp UPN + Passwort pro Benutzer), dann die Begrüßungsvorlage senden | CIT-Mailer SharePoint-Liste/-Site |
| 3 | AvePoint-Fly-CSV-Vorlagen herunterladen und manuell mit den vorhandenen Migrationsdaten befüllen | Lokaler / freigegebener Ablageort der Vorlagen |
| 4 | Fly-Projekte anlegen (Exchange, Teams, OneDrive; SharePoint manuell) und die ausgefüllten CSVs hochladen. Ziel-Teams/Räume vorab erstellen. | AvePoint-Fly-Portal |
| 5 | Migrationskommunikation über den Mailer senden | Power Automate → Für mich freigegebene Flows → Migration Mailer Flow |
| 6 | Nach Abschluss der Erstmigration den Zwischenhinweis über den PA-Flow-Mailer senden und eine Datenbestätigung anfordern | Derselbe PA-Flow |
| 7 | Wöchentliche inkrementelle Migrationen bis zum Abschluss starten | AvePoint-Fly-Portal |
| 8 | Domänentransfer durchführen (gleicher Prozess wie in Zweig 1) | Entra ID / M365 Admin Center |
| 9 | templates/PostMigration_Template.csv ausfüllen (oder die Provisionierungs-
Ergebnis-CSV wiederverwenden), dann den Nach-Migrations-Swap ausführen, um UPN + primäre
SMTP jedes Objekts auf das Ziel zu setzen. Optionale Adressanreicherung über eine lokale
CompanyDomains-CSV. |
GitHub → branch2/Set-PostMigrationDomain.ps1 |
| 10 | Den abschließenden Migrationshinweis über den PA-Flow-Mailer senden | Derselbe PA-Flow |